Tuesday, 31 December 2013


Traditional Way of Printing with and Extracting Indigo
Traditional Ways of Printing with and Extracting Indigo
Indigo has a special place in the history of textiles. It is not merely a colour; it is a complete craft process. The blue that we see on cloth does not come easily. It has to be coaxed out of the plant, transformed through fermentation or chemical reduction, allowed to enter the fibre, and finally brought back to blue through contact with air.
This is what makes indigo different from many other natural dyes. Many dyes are applied in a dissolved form and then fixed to the fibre with suitable mordants or process controls. Indigo, however, is naturally insoluble in water. To use it for dyeing or printing, the dyer must first convert it into a soluble reduced form. Only then can the colour enter the cloth or yarn. After exposure to air, it oxidizes and becomes blue again.
The traditional knowledge around indigo therefore combines plant science, chemistry, patience, and skilled hand practice. This article explains the traditional extraction of indigo, the making of an indigo vat, the use of indigo in printing, and the logic behind the colour change that makes indigo so fascinating.
Table of Contents
- Why Indigo is Different from Many Other Dyes
- Extracting Indigo from Fresh Leaves
- Another Traditional Method: Crushing the Leaves
- Making an Indigo Vat
- Dyeing with Indigo
- Indigo Printing in Machilipatnam
- Fixing and Washing the Printed Cloth
- The Chemistry Behind the Craft
- Sashiko and Indigo Textiles
- Motifs in Indigo Printing
- Why Indigo Matters
- Related Reading
- General Disclaimer
Why Indigo is Different from Many Other Dyes
The beauty of indigo lies in its unusual dyeing behaviour. Indigo pigment is not readily soluble in water. This means that the blue pigment, in its ordinary oxidized form, cannot simply dissolve in a dye bath and enter the fibre like many other dyes.
To dye cloth or yarn, indigo must first be converted into a reduced soluble form called leuco-indigo. This form can penetrate the fibre. When the material is removed from the vat and exposed to air, oxygen converts the reduced form back into insoluble blue indigo. The colour therefore develops through oxidation.
A simplified way to understand the process is:
\( \text{Insoluble Indigo} \rightarrow \text{Soluble Leuco-Indigo} \rightarrow \text{Insoluble Blue Indigo on Fibre} \)
This is why indigo dyeing often looks almost magical to an observer. The cloth may come out of the vat looking yellowish, greenish, or dull. Then, as it meets the air, it slowly turns blue. The colour appears before the eyes, but the transformation is actually a controlled chemical process.

Extracting Indigo from Fresh Leaves
Traditionally, indigo extraction begins with fresh indigo leaves. The leaves are steeped in water, often in a tank or cistern, for several hours. In some descriptions, the leaves are left for about twelve hours, though the exact time depends on the climate, the condition of the leaves, and the local method.
During steeping, the leaves begin to decompose. Enzymes and microorganisms act on the natural compounds present in the leaves. The important compound in the leaf is indican, which is colourless. Through hydrolysis, indican breaks down into indoxyl and glucose.
The first stage may be represented simply as:
\( \text{Indican} + \text{Water} \rightarrow \text{Indoxyl} + \text{Glucose} \)
This is an important point. The blue pigment is not present in the fresh leaf in its final usable form. The leaf contains a precursor. The blue colour is created only after a sequence of chemical changes.
Once the leaves have steeped sufficiently, they are removed from the liquid. The liquid is then transferred into another tank or vessel and stirred, beaten, or agitated vigorously. This introduces oxygen into the solution. In the presence of oxygen, indoxyl molecules combine to form indigotin, the familiar blue pigment of indigo.
The blue pigment is insoluble and gradually settles at the bottom of the vessel as a blue sludge. This sludge is then collected, filtered, drained, and dried. After drying, it may be shaped into cakes, blocks, balls, or squares. In this compact form, indigo becomes easier to store, transport, sell, and use.
Thus, the journey from green leaf to blue pigment involves three broad stages: steeping of the leaves, oxidation of the extracted liquid, and collection and drying of the blue pigment. This simple-looking process hides a great deal of experience. The artisan must know when the leaves have steeped enough, how vigorously the liquid should be stirred, when the pigment has settled, and how to dry and store it properly.
Another Traditional Method: Crushing the Leaves
In another traditional method, fresh leaves are crushed and compacted to form a sticky paste. This paste is drained and shaped into balls. Such methods are useful when the dye material has to be preserved, stored, or transported in a convenient form.
The final form of indigo may vary from region to region. In some places, it is made into cakes; in others, into balls or blocks. These forms are not only practical but also reflect local tradition, available tools, and the needs of dyers and printers.
Making an Indigo Vat
To dye cloth or yarn with indigo, the blue pigment has to be converted into a soluble form. This is done in an alkaline reducing vat. The vat is the heart of indigo dyeing, because it changes insoluble indigo into a form that can enter the fibre.
Indigo vats are sometimes buried in the ground. This is done because earth and sand act as natural thermal insulators. They help maintain a more constant temperature in the dye bath. Temperature control is important because the behaviour of the vat depends on the balance of alkalinity, reduction, and microbial or chemical activity.
In traditional vats, the water may be filtered through wood ash. Wood ash contributes alkalinity and may also help reduce froth and suspended particles. Depending on the local practice, materials such as lime, sodium carbonate, molasses, starch, alcohol, or other organic substances may be added. Some vats are based mainly on fermentation, while others use stronger chemical reducing agents for quicker results.
The dyer watches the vat carefully. The colour of the liquid, smell, surface bloom, froth, temperature, and behaviour on the yarn or cloth all provide clues. In many natural dyeing traditions, the vat is treated almost like a living system. It has to be maintained, fed, revived, and used with care.

Dyeing with Indigo
When cloth or yarn is dipped into the reduced indigo vat, it does not immediately appear deep blue. It may come out yellowish, greenish, or pale because the indigo is still in its reduced soluble form.
The colour develops when the material is exposed to air. Oxygen from the atmosphere acts on the reduced indigo. The leuco-indigo oxidizes and turns back into insoluble blue indigo inside and on the surface of the fibre.
For darker shades, the same cloth may be dipped and oxidized several times. Each dip adds more depth. The skill lies in controlling the number of dips, the strength of the vat, the time inside the vat, and the oxidation time between dips.
Indigo Printing in Machilipatnam
Indigo is not only used for dyeing; it is also used for printing. One traditional example comes from the printing practices associated with Machilipatnam. In printing, the artisan needs a paste rather than a simple liquid dye bath. The paste must have the right body so that it can be applied clearly to the cloth using blocks or other printing tools.
If the paste is too thin, the design may spread and lose sharpness. If it is too thick, it may not print evenly. Therefore, the consistency of the printing paste becomes a matter of craft judgement. The printer understands the paste through hand, eye, and experience.
A traditional description of the process may be understood as follows. Rice flour is mixed with water and heated to make a starchy paste. A cake of indigo is ground into powder. About two hundred and fifty grams of indigo powder may be mixed with a small quantity of castor oil. To make the dye usable quickly, caustic soda and hydrosulphite powder are added.
The ingredients are combined in stages. The starch is added last and stirred until the paste reaches the correct consistency for printing — not too runny and not too thick.
Here, each ingredient has a role. Indigo provides the colour. Caustic soda creates the alkaline condition. Hydrosulphite acts as a reducing agent, converting indigo into a usable reduced form. The starch gives body to the paste. Castor oil may help in grinding, dispersion, and smoothness of the paste.
This is a good example of how traditional craft and practical chemistry meet. The printer may not describe the process in laboratory language, but the working knowledge is precise. The artisan understands the behaviour of the paste through observation, repetition, and experience.
Fixing and Washing the Printed Cloth
After printing or dyeing, the cloth is dried for much of the day. It may then be immersed in a lime solution, followed by an iron sulphate solution. After this, it is rinsed several times, sometimes including a rinse in boiling water.
These after-treatments help complete the process and remove unfixed material. By this stage, the colour becomes more stable. Proper oxidation, washing, and finishing are important for developing good fastness.
A well-processed indigo cloth should not fade quickly in sunlight or washing. However, indigo also has a special surface character. In many fabrics, especially denim and other heavily dyed textiles, indigo may gradually rub, soften, and fade with use. This is part of its charm. But in traditional printing and dyeing, the aim is still to obtain a clear, well-developed, and reasonably fast colour.
The Chemistry Behind the Craft
The indigo process can be understood through a simple sequence. The leaf contains indican. During steeping, indican is hydrolysed to indoxyl. On exposure to oxygen, indoxyl forms indigotin. During dyeing, indigotin is reduced in the vat to leuco-indigo. On exposure to air, leuco-indigo oxidizes back into blue indigo on the fibre.
A simplified indigo journey:
\( \text{Indican} \rightarrow \text{Indoxyl} \rightarrow \text{Indigotin} \rightarrow \text{Leuco-Indigo} \rightarrow \text{Blue Indigo on Fibre} \)
This sequence explains why indigo requires so much process knowledge. The dyer has to move the colour between different chemical states. The blue pigment must first be formed from the plant, then reduced to become soluble, then oxidized again to become blue and fixed in the cloth.
This is why indigo dyeing is often called both an art and a science. The artisan is controlling chemistry through traditional practice.

Sashiko and Indigo Textiles
The notes also refer to Sashiko, a Japanese stitching tradition. Sashiko involves placing several layers of cotton fabric together and sewing them with running stitches, traditionally using cotton or hemp yarn.
Although Sashiko is not a method of extracting indigo, it is strongly associated with indigo-dyed textiles in Japan. The combination of white running stitches on deep blue cloth became visually distinctive. In this way, indigo was not only a dye but also part of a larger textile culture involving repair, reinforcement, decoration, and everyday use.
Motifs in Indigo Printing
Traditional indigo printing is not only about chemistry. It is also about design. Motifs carry local vocabulary, memory, and identity. The notes mention motifs such as Dogga and Shakka, with Shakka possibly described as a wheel-like motif.
Such motif names should be verified regionally because spellings and meanings can vary across craft traditions. Many textile motifs change names as they move between languages, regions, workshops, and communities.
Why Indigo Matters
Indigo matters because it connects agriculture, craft, chemistry, trade, and culture. A small green leaf becomes a blue pigment. That pigment becomes a vat. The vat becomes a dyed yarn or printed cloth. The cloth becomes a garment, a household textile, or a cultural object.
Every stage requires knowledge. The farmer must grow the plant. The extractor must know how to ferment and oxidize the leaves. The dyer must know how to prepare and maintain the vat. The printer must know the right paste consistency. The washer must know how to finish the cloth. The user finally sees only the blue colour, but behind that blue lies a chain of skilled work.
Traditional indigo is therefore not just a dyeing method. It is a complete knowledge system.
Conclusion
The traditional way of extracting and printing with indigo shows the depth of textile wisdom developed by artisans over generations. The process begins with leaves and water, moves through fermentation, oxidation, reduction, printing, drying, washing, and finishing, and finally produces one of the most loved colours in textile history.
Indigo teaches us that colour is not always immediate. Sometimes colour has to be prepared, transformed, hidden, released, and fixed. The blue that finally appears on cloth is the result of patience, observation, and careful control.
In this sense, indigo is more than a pigment. It is a story of transformation — from plant to paste, from vat to fibre, and from invisible chemistry to visible blue.
General Disclaimer
This article is intended for educational and informational purposes. Traditional indigo extraction, vat preparation, dyeing, printing, and after-treatment practices vary across regions, communities, materials, water quality, climate, and workshop methods. Chemical names and process descriptions have been presented in simplified form for textile understanding.
Where chemicals such as caustic soda, hydrosulphite, lime, iron salts, or other alkaline and reducing agents are used, proper safety precautions, ventilation, protective equipment, disposal practices, and local regulations should be followed. Readers should not treat this article as a substitute for hands-on training under an experienced dyer or for formal chemical safety guidance.
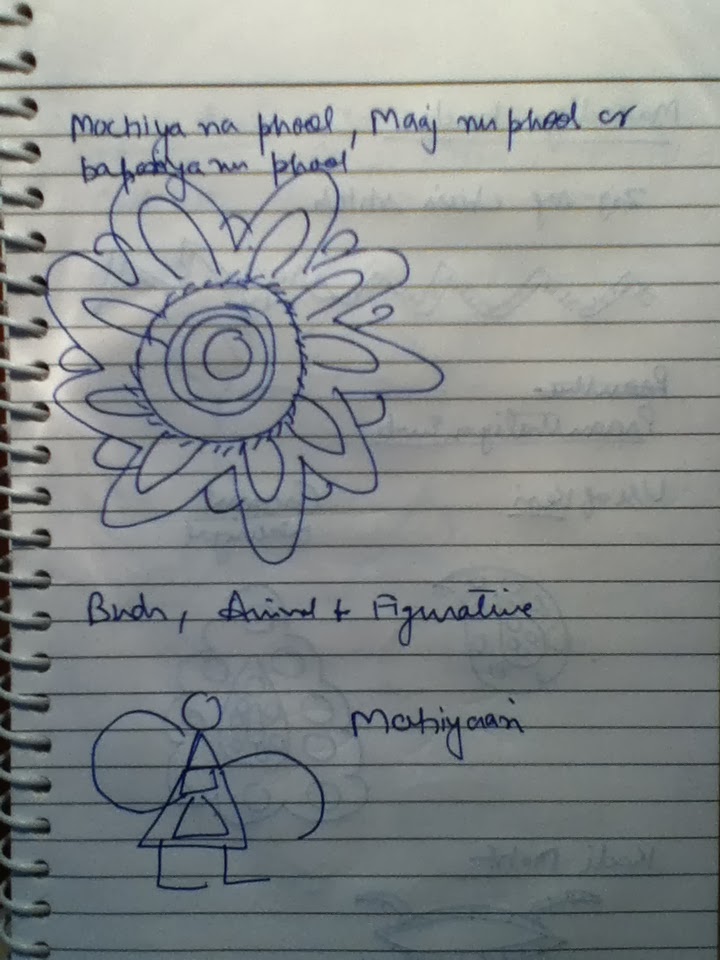
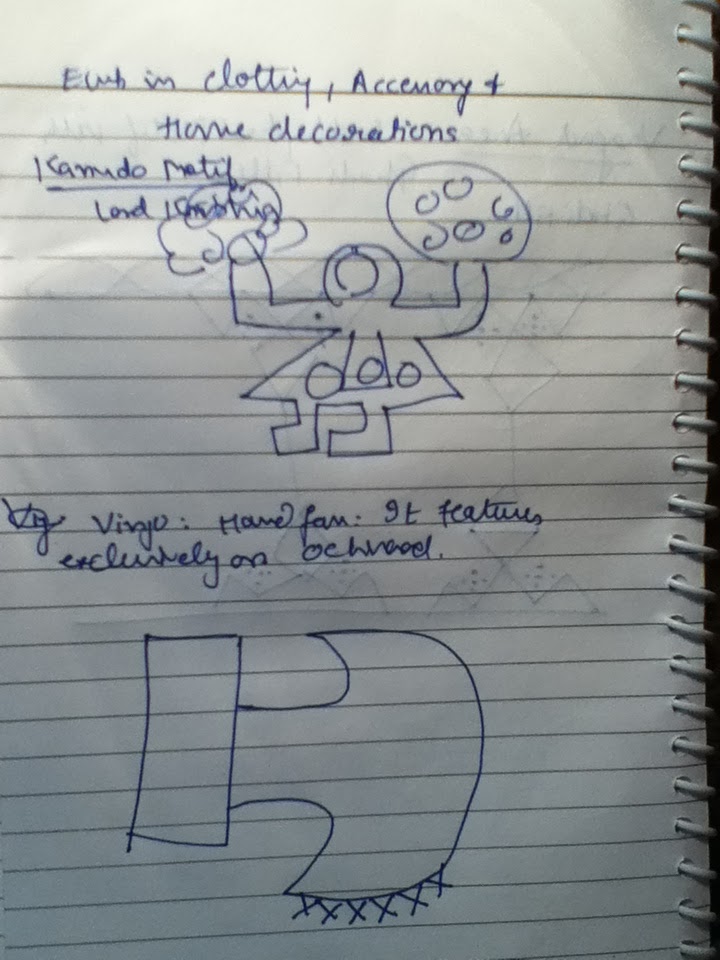
Aahir Embroidery - My Handwritten Notes
The following are the handwritten notes from Aahir Embroidery of Kutch. Cannot convert them into the text format due to paucity of time. The source of these notes is the book: "Stitch in Time- by Lyla Bavadam"
An amazing article on the embroidery technique can be found here. You can view the video here.


An amazing article on the embroidery technique can be found here. You can view the video here.


Sunday, 13 October 2013


Saturday, 28 September 2013
Commonly Used Laces and Trims for Indian Ethnic Garments
The following laces are commonly used in Indian Ethnic Garments meant for mass market.
1. Embroidered Laces
These are available in sizes ranging from 1 inch to 5 inch and with a packing of 9 meters. These are not dyeable and pre determined color charts are available.


8. Crochet Laces
These are available from 1/4 to 4 inches and are dyeable.


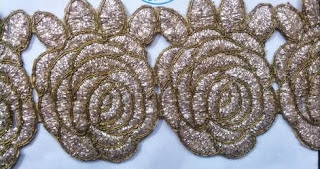
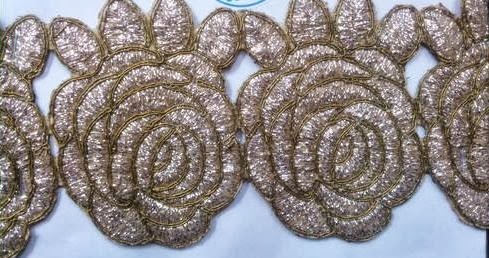
9. Hyderabadi Gota
These are available from 1/2 inches to 3 inches and in a packing of 10 meters.


Source
1. Embroidered Laces
These are available in sizes ranging from 1 inch to 5 inch and with a packing of 9 meters. These are not dyeable and pre determined color charts are available.


2. Banarasi Laces
These are available in sizes from 0.5 inches to 5 inches and with a packing of 20 meters. These are not dyeable and pre determined color charts are available.
3. Needle Laces
These are available in sizes ranging from 1/2 inches to 2 inches and with a packing of 9 meters. These are not dyeable and pre determined color charts are available.

4. GPO Laces or Chemical Laces
These are available in sizes from 1 inch to 6 inches and with a packing of 20 meters. These are in cotton and dyeable.
5. Sequence Laces
These are available in 0.5 to 2.5 inches and are not dyeable. These are available in the packing of 9 meters.


This third lace is also called Khajuri Lace.
6. Designer Laces
These are available in 0.5 inches to 2.5 inches. These are multicolored and available in the packing of 9 meters. These are not dyeable.


7. Moti Laces
These are available in the packing of 8 meters. These are not dyeable.


These are available from 1/4 to 4 inches and are dyeable.


9. Hyderabadi Gota
These are available from 1/2 inches to 3 inches and in a packing of 10 meters.


Source
Thursday, 15 August 2013
How to Make Patialas and Churidars
Here are two amazing videos on the techniques of Making Patiala and Churidar
Sunday, 4 August 2013
My Textile Notes in Indian Institutes of Technology
Thanks to your encouragement, mytextilenotes.blogspot.com is now a reference resource in NPTEL ( National Programme on Technology Enhanced Learning ) which is an initiative by seven Indian Institutes of Technology (IIT Bombay, Delhi, Guwahati, Kanpur, Kharagpur, Madras and Roorkee) and Indian Institute of Science (IISc) for creating course contents in engineering and science.
In their web course on Fabric Structure and Design, the blog is featured under hyperlinks in the additional reading section. See the reference here.


Started in 2006, this blog has become a reference resource for quite a few textile colleges also.
I thank you for all the support and motivation provided by you through your emails, comments and phone calls !! Will strive to make it even better.
Saturday, 8 June 2013
Thanks for your support
I have just changed the company and in the process of understanding new systems, hence I am not able to contribute for some time. However, will be back again very soon. Thanks for your support.
Monday, 4 March 2013
Dye Identification
I was looking for simple methods to identify class of dyes on fabric. Broadly I work with cotton, linen, silk and union fabrics of silk and viscose. The dyes that I am looking for to identify are direct, reactive, acid ( on silk), sulphur, vat, aniline black and napthols.
Here are some methods to test these dyes. I got the idea from this document. However I have not tested them so far.
1. Direct Dyes
This test of direct dye holds valid for both cotton and silks.
A 100-300 mg portion of the dyed sample is placed in a 35 ml test tube, 5-10 ml of water and 0.5 to 1 ml of conc. ammonia are added and the mixture is boiled in order to bleed off a sufficient amount of dye for redyeing a piece of white cotton cloth.
When a sufficient amount of dye has bled from the sample, the sample is removed, a piece of white cotton cloth weighing 10-30 mg is placed in the test tube and 5-30 mg of common salt is added. After boiling gently for 40-80 seconds and cooling to room temperature, the cotton is removed, rinsed and examined.
Redyeing on cotton in an ammonical solution in the presence of salt to shade and strength comparable to the shade and strength of the original sample is a direct evidence of direct dye.
2. Acid Dyes
For wool and Silk
A 100-300 mg portion of the dyed sample is placed in a 35 ml test tube, 5-10 ml of water and 0.5 to 1 ml of conc. ammonia are added and the mixture is boiled in order to bleed off a sufficient amount of dye for redyeing a piece of white cotton cloth.
The above part is same as acid dyes. However, if the sample in the direct dyes bled but left the test cotton white or only slightly stained, the colored extract is neutralized with 1 ml of 10% sulphuric acid solution and a few drops of acid are added in excess. A 20-30 mg of wool is added and the mixture is boiled for 1 to 2 min. The wool is rinsed and examined.
Redyeing of wool from an acid bath indicates the presence of acid dyes provided the presence of direct dyes is not shown.
3. Sulphur Dyes
For Cotton
A 100-300 mg of dyed sample is placed in a 35 ml test tube and to it are added 2 to 3 ml of water, 1 to 2 ml of 10% sodium carbonate solution and 200-400 mg of sodium sulfide chips.
The mixture is raised to a boil and boiled for 1 to 2 minutes. The sample is removed and to the test tube are added 25-30 mg of white cotton and 10-20 mg of common salt. After boiling for 1 to 2 minutes, the cotton sample is removed and placed on filter paper and allowed to reoxidize.
Under these conditions, sulfur dyes redye cotton in a shade which differs from the original only in strength. A few easily reducable vat dyes will color the white cotton but in a shade markedly different from the original dyeing.
Vat Dyes
For Both Cotton and Protein ( For protein also follow the portion in Red font)
Vat dyes are to be tested after the sulphur dye test has come negative.
A 100-300 mg dyed sample is placed in a 35 ml test tube to which are added 2 to 3 ml of water and 0.5 to 1 ml of 10% caustic soda solution (The mixture is boiled till all the fiber is dissolved). After being brought to boil a 10-20 mg portion of sodium hydrosulphite is added and boiling continued for another 0.5 to 1 minute. The sample is removed( Not Needed) and 25-50 mg of white cotton cloth and 10-20 mg of salt is added. Boiling is continued for 40-80 seconds, followed by cooling to room temperature. The cotton is removed and placed on filter paper to oxidize (then in a bath containing sodium nitrite and acetic acid).
Redyeing of cotton to a shade differing only in strength from the original dyeing indicates the presence of vat colors.
Napthol and Insoluble Azo Dyes
The most characteristic property of this class is bleeding
in pyridine. A 10-50 mg dyed sample is placed in a 10-15 ml test tube, 1-2 ml
of pyridine added and the sample boiled. All napthol bleed to certain extent.
Reactive Dyes
Boil in water with a temperature more than 60 deg in Sodium
hydrosulphite and caustic soda as in vat dyes. First the color will come out
and then that color will decolorize.
Saturday, 2 March 2013
Indian Ethnic Fabric Buying- Evaluating Vendors -2
<---Continued from Indian Ethnic Fabric Buying- Evaluating Vendors-->
Traditional techniques used by a particular vendor also make him important in terms of buying. Traditional techniques make the vendor unique among others and make him valuable in terms of planning as the techniques demand more lead time and quality checking. It assumes more importance if the vendor belongs to the same region which is the origin of these techniques. For example vendors supplying Dabu, Bagru, Ajrak, Bandhni, Lehariya and Patri from Rajasthan are rated higher as they are using the traditional techniques in printing the fabrics. For similar reason block printing vendors are rated higher than screen printing vendors and vendors using handloom are rated higher than those using powerloom.
Exclusivity of the vendor for a particular company makes him valuable. As the vendor is not supplying to any other company, the possibility of desgins and language leaking to ther other compaies is obviated. Also obviated is the fluctuations in supply as the whole capacity of the vendor is planned when ordering fabrics or garments.
Percentage of quality rejections is one of the most important factors in evaluating the vendors. More quality rejections will not only throw a question in the vendors' ability to supply a particular quality of fabric, it will also throw question on the viablity of bulk produciton of that traditional techniques.An example of this is very pertinent here. A retail organisation traditionally does Milspun x Khadi yarn in one of its most selling garments. When they tried to do it in Khadi x Khadi yarn, the number of quality issues become so high that they have to abondan that design using fabric.
Price is a very important factor in evaluating a vendor. A vendor traditionally supplying goods at reasonable price are rated higher. However, in traditional textiles, low prices have their own social and envinornmental costs. In handloom weaving for example the production is distributed by traders to the weavers at a pittance in order to keep down the prices. Similarly the traditional prints are sold at lower costs because the printers still have not heard of affluent treatment plants and the affluents are simply added in the rivers or canals. But high prices are also no guarantee of the quality of the merchandise. I know a printer who does excellent block printing in terms of design. Every year the prices are raised in order to save the block printing and the printers with the result that his prices have become inordinately high.
<-- To be continued-->
Thursday, 28 February 2013
Indian Ethnic Fabric Buying- Evaluating Vendors
Evaluation of the vendors for Indian Ethnic Fabric is more of an art than a science simply for the fact that there are many soft factors involved. Indian ethnic fabrics are masterpieces generally belong to a particular community who has perfected the art of producing it traditionally. When it comes to dealing with small volumes, you can get very good quality. But the moment the volume go bigger and is limited by delivery timelines, all sort of problmes start happening. Hence it is important to know your vendor before an order is placed with him/her. Generally the crieteria revolves around dealing with the vendors for a few years before making any evaluation.
Time of association with the company is a very important factor. The older the vendor/artisan is with a company, he understands the modus operandi of the company, the likes and dislikes and adept itself to work in the way. This leads to saving in time when explaining designs and fewer rejections.
Volume and value of the fabric done per year is another factor that needs to be looked into. More volume done with the company indicates the vendor's capacity. Evaluating capacity of an artisan is very different from evaluating the capacity of the mill wherein one can count the number of machines and multiply by speed and efficiency to get the capacity. Generally artisans work in small clusters and the looms/printing tables are distributed over a wide geographicaly area. If a vendor can deliver volume that indicates his relationships with the vendors and his financial strength. In case of Tussars/Bhagalpur silks this is of critical importance as the greige fabric has to be booked in advance of one year and colors are indicated closer to the season. The vendor should have the financial strength to hold on the stock for that period.
Innovative designs shown and converted every year is the vital factor for a vendor. It ensures that his margins keep on increasing, his development costs are low and the company is invigorated by the infusion of new designs. Normally, the time of association with the company determines this factor. Block printing can be done on various textures of the fabrics available. Similarly the designs from the saris can be translated into dupattas and stoles after suitable modification. This ensure that the story of the brand is intact and the same language is conveyed to the loyal customer who flock to the stores to get the quintessance of the the brand.
A vendor becomes important if the designs shown by him are impossible or difficult to reproduce anywhere else. That ensures that he gets his desired price points and can dicate terms with regard to production or delivery. It happens in case of traditional wovens and prints that are produced using indiginous techniques like Bagru, Dabu, Jamdanis, Chanderi and Sanganeri Butis.
--To be Continued in the Next Post-----
Subscribe to:
Posts (Atom)